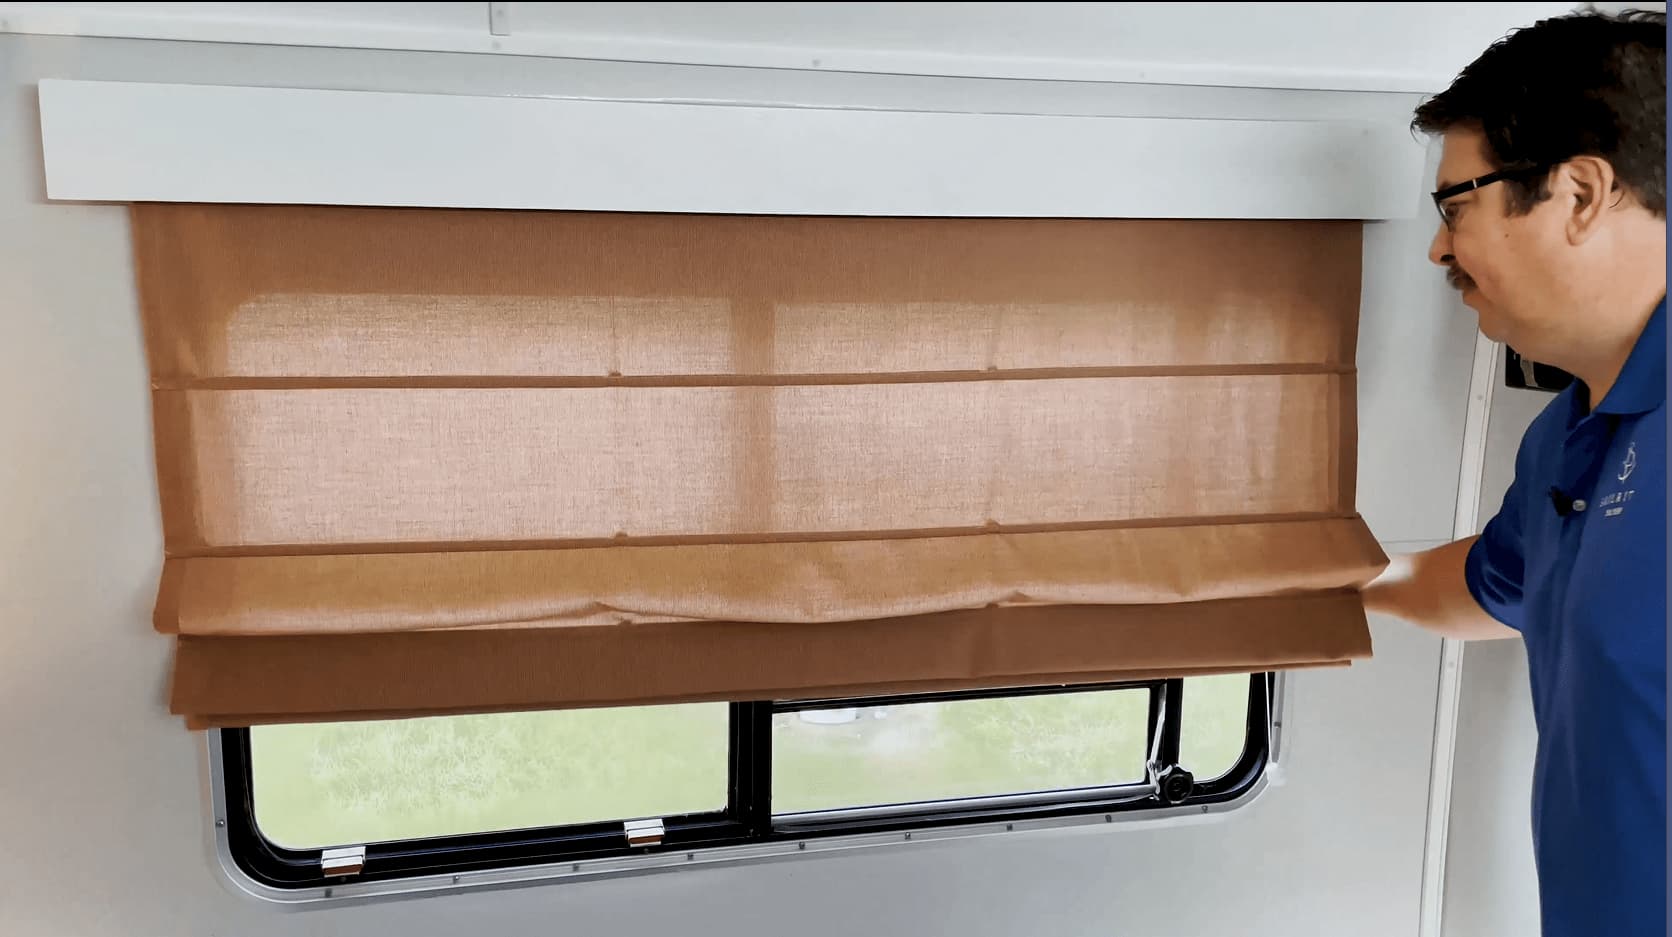
A Sleeve-ribbed Roman Shade.
A Sleeve-ribbed Roman Shade.
The sleeve-ribbed roman shade is named for the particular way that ribs are secured to the surface of the shade. This construction technique results in a very smooth and attractive shade. It is also relatively easy to make. The one disadvantage is that adding a lining to provide for increased durability or sun masking becomes difficult (it is difficult to keep the two layers of cloth aligned without wrinkles). Thus, we recommend that these shades be created with just one layer of material. In other respects they are similar to other roman shades.
Almost any fabric can be used for this shade. Of course we all have preferences. I like Phifertex and SheerWeave and Sunbrella Sling outdoor fabrics for their durability and suppleness. Since there will not be a lining, pick a fabric that provides the level of light filtration desired.
Jim Grant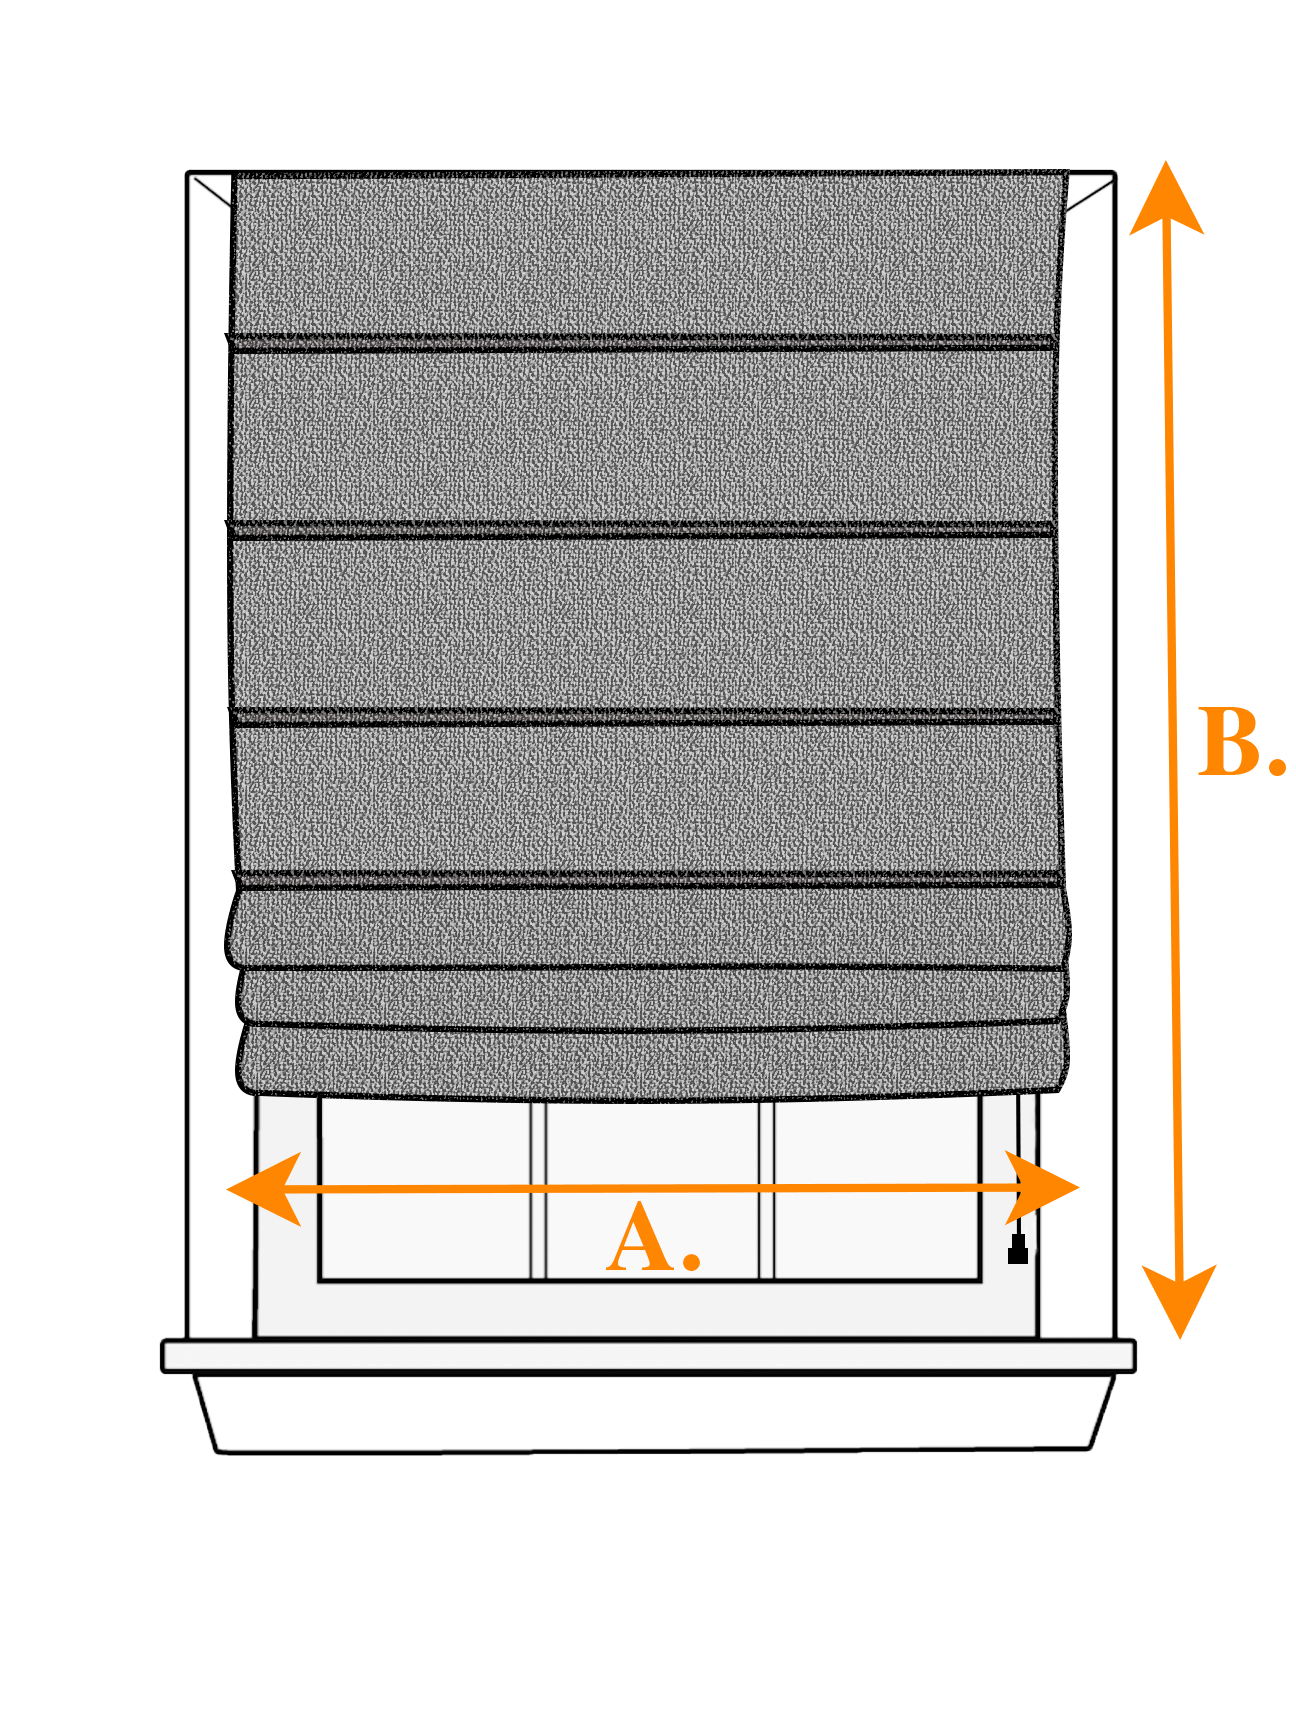
The Calculator Width and Length Fields
Height and width, the first two input fields, are the only measurements needed. The height and width are not dependent on any feature of the covered window opening -- the shade can overlap the opening height or width as much or as little as desired.
The fabric width, the third input field, can be measured or the figure given in the Sailrite Catalog or online can be used.
The Sailrite roman shade ribs are 1/4 inch and the calculator defaults to that.
If more than one shade of the given size is to be made, any vertical pattern repeat in the fabric (available online or in the Catalog) should be indicated so extra fabric allowing for consistent pattern placement on all the shades will be included. Horizontal repeat is not required --the calculator centers shades on the fabric rendition so horizontal alignment will remain the same from shade to shade without fail.
The desired rough height of the finished stack (the final input field in the calculator) is a rough indication of the width of the folded shade at its minimum. This dimension defaults to a height that will result in an attractive shade. But the default value can be changed if desired. Reducing this number results in more and narrower folds. Increasing it will lead to fewer and wider folds.

The Data Entry Process on an IPhone -- a tap on each input field will roll out a keypad
When the input fields are filled with 29 inches of width and 48 inches of height and 54 inch wide fabric, hitting the "Calculate" button results in the display on the right below.

Hit CALCULATE and ...
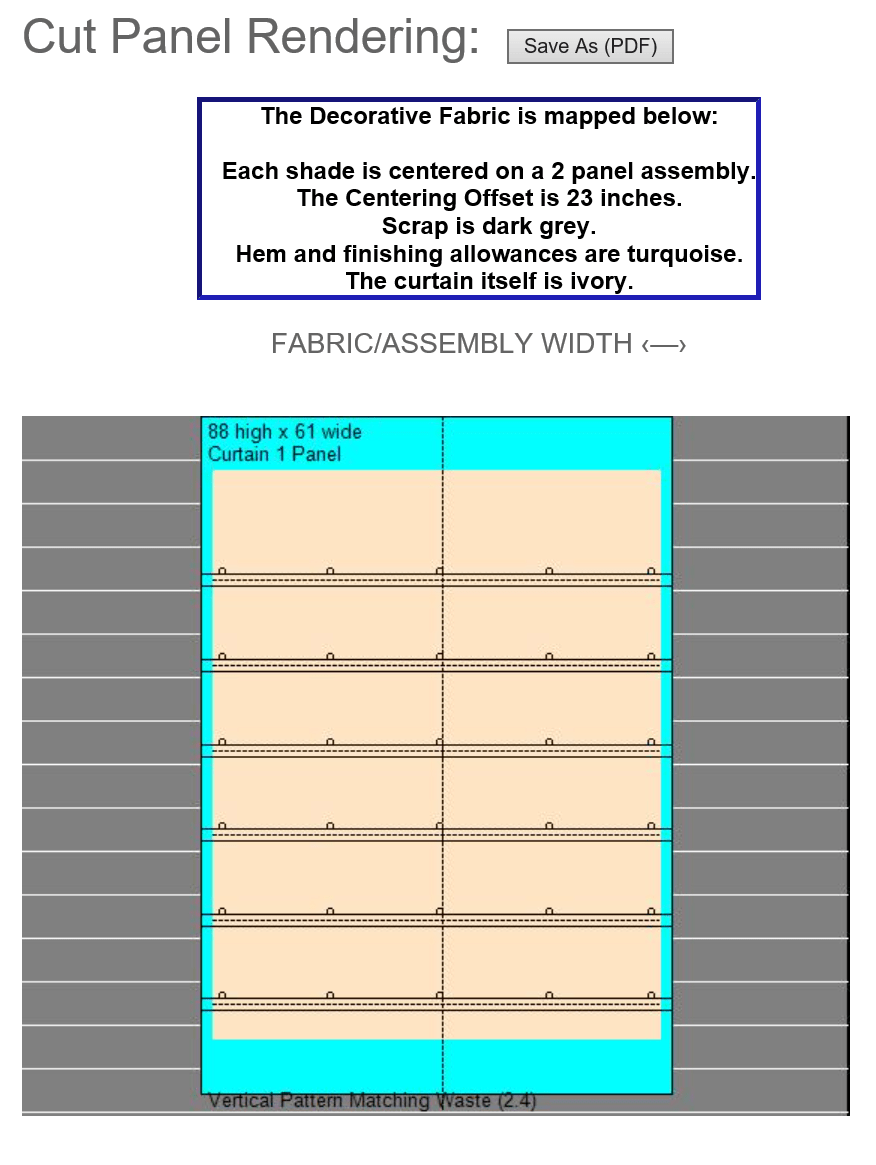
Under "Cut Sizes" the fabric blank for our sample shade is 32 on the width of the fabric by 61 inches along the fabric length. Both numbers are derived from the finished width and lengh input figures (29, 48 respectively). The cut dimensions provide for 3 inches of extra width for the double hems along both sides of the shade. The length dimension provides extra fabric to make a weight bar pocket at the bottom of the shade, sleeves for each rib, and extra fabric at the top to cover the lift line hardware and a headboard. This "extra" fabric is blue in the shade rendition.
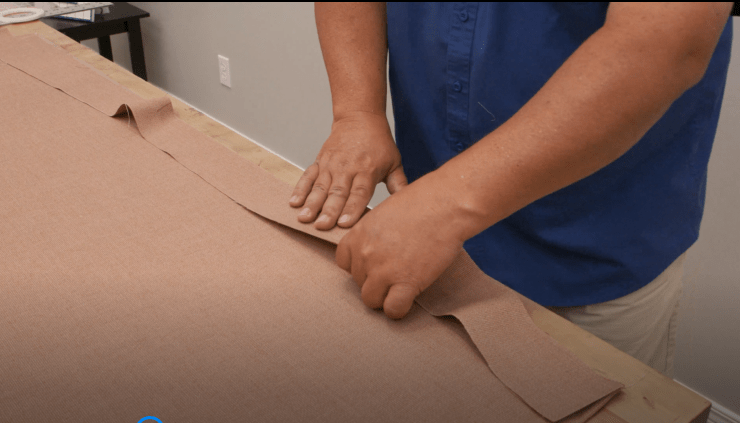
Each shade will start as a fabric "blank" (32 by 61 in our case). If the blank width is greater than one fabric width, there will be two or more panels indicated on the rendition with a dashed black line or lines. If two or more panels are required to make up the blank, they should be trimmed as necessary to remove unfinished edges (the trimmed width is what should be entered in the Calculator width field). The required panels are sewn together with 3/8 inch (.95 cm) seam allowace. We like to use a semi-flatfelled seam to provide a finished top surface.
To make this seam first apply 1/4 inch basting tape (Sailrite part #129) to the top surface of one panel edge. Keep the tape right along the edge of the fabric. Peel the paper backing away from the tape, revealing the adhesive underneath. Then place the next panel on top of this first one -- the "top" surfaces of the fabric should be face to face.
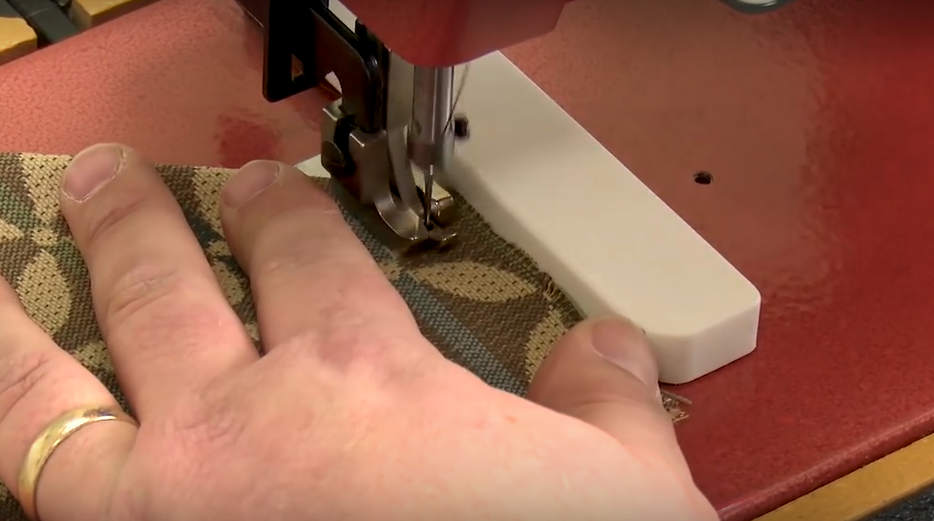
A Magnetic Sewing Guide for the 3/8 inch Stitch Spacing is Helpful
Then run the matched panels through a sewing machine with a straight stitch inside the two edges exactly the width of the edge allowance. A magnetic sewing guide will help keep this stitch straight and accurate, but a strip of masking tape on the machine can also work in this capacity.
When the two panels are opened (as though they were butterfly wings) the seam allowance will be underneath. Fold the basted seam allowance over on one side or the other and press it in place with a warm iron (set the iron temperature appropriately for the fabric). Finish the seam with a row of stright stitches about 1/8 inch from the fold to hold the allowance in place. Click here for more detail and a video.
A rendition "blank" for a 58 by 65 inch shade with a 5.65 inch Vertical Pattern Repeat
If the chosen fabric has a pattern it will look best if that pattern is in the same place vertically and horizontally from shade to shade. This app matches horizontal pattern repeats by centering panels on the fabric blank (whether it is one fabric width or several). To match the vertical repeats on succesive cushions cut from the same roll of cloth, displace the cut panels vertically by the remainder of the panel length divided by the vertical pattern repeat. If you enter the vertical pattern repeat in the appropriate input field, the app will automatically calculate the additional fabric that should be ordered. Indeed, the app will indicate the pattern repeat on the rendition with white lines and vertical offsets will be printed in the key dimensions box along with the centering margins and any separation offsets if two or more panels can be cut side-by-side across the with of the fabric.
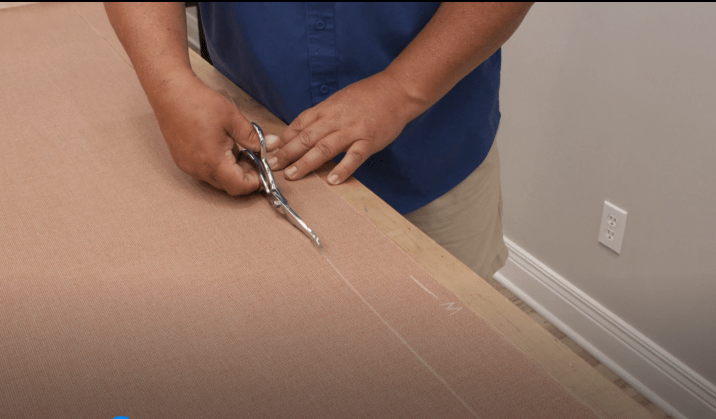
Cutting the Shade
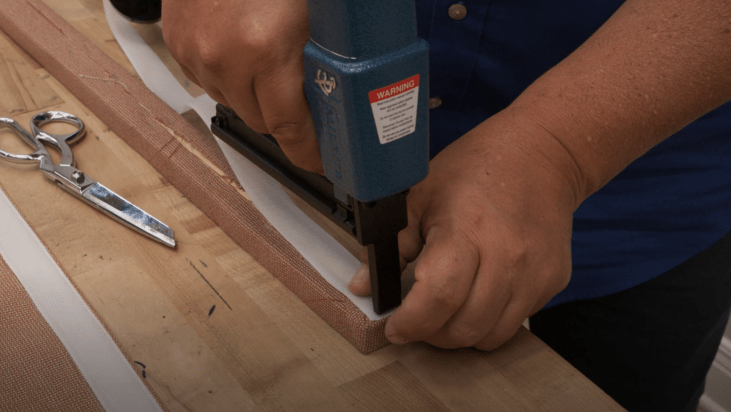
Cut each shade from the blank or blanks using the "Cut Size" dimensions indicated on the rendition. Cut these shapes as simple rectangles. The corners must be square if the shades are to hang properly. All edges will be finished with hems so a scissors can be used as shown.
Each shade will have a 3 inch "facing allowance" which is used to fashion a sleeve for the weight rod at its bottom. Fabric for this construct is provided by cutting away 3 inches of material from the bottom of the rectangle above (it is a good idea to temporarily label "top", "bottom", "length", and "width". Set the facing allowance aside for now.
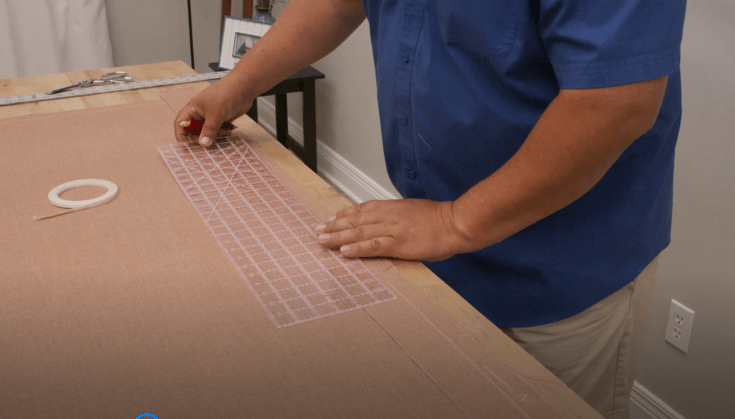
Marking the Edge for Hem Creation
Each hem will be a double thickness fold. With the shade face down on the work surface mark the fabric as shown here first 1 inch inside the edge and fold to that line creating a 1/2 inch fold. Then mark a second line 2 inches inside the resulting fold and crease a second fold 1 inch deep to that line. We like to use a double sided tape ("Seamstick") to hold everything in place. Place the tape carefully to keep it out from under stitches (otherwise your needle could get gummed up requiring frequent cleaning). Of course, pins can also be used and many experienced sewers are able to secure accurate hems without any basting at all (pressing them with a warm iron can be helpful).
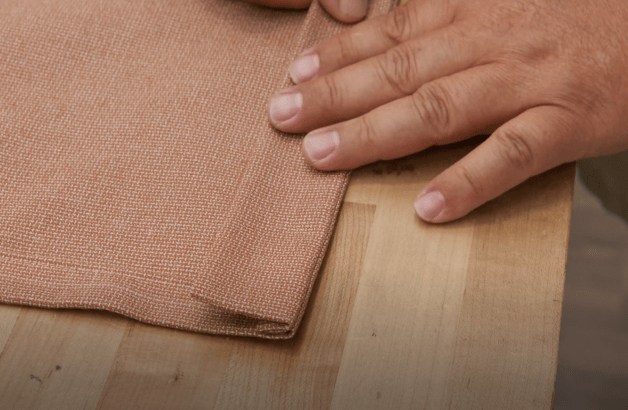
Completed Hems Should Result in Intended Shade Width
Find the center of all the edges to be sewn and place marks on the face up side in the edge allowance. Start the final assembly by placing the bottom plate face up on the floor or on a table. Run 1/4 inch basting tape all round its edges. Peal the paper backing off one side at a time and smooth the appropriate facing edge (with the top plate face down) in place starting from the center marks and working to the ends. Each side can be sewn after basting or the sewing can be put off until all the basting is done. Each stitch line should be just the edge allowance inside the two basted panels. As before, a magnetic sewing guide can be very useful here.
Basting the 3 Inch Strip Along the Bottom Edge of the Shade
Marking the 2 Inch Fold Line to Create a 1 Inch Hem at the Top of the Strip
Folding the Sleeve Strip Over Onto the Back of the Shade
With the shade back side down baste the 3 inch wide strip of fabric cut away earlier. Center it on top at the bottom of the shade and sew a half inch or so above the matched bottom edges. With the shade back on the table put down a "fold to" line 2 inches from the upper edge of the 3 inch strip. Fold and baste that edge over to the line to create a 1 inch hem on the top of the strip. Sew this hem in place. The strip should now measure just 2 inches from the folded hem along the top edge to the raw edge at the bottom.
Baste the ends of the strip that exend beyond the shade edge (sewing is optional) and fold that excess material over to hem the sleeve ends even with the sides of the shade. Now the entire strip can be folded over to the back side of the shade (currently facing down on the work table -- feel free to turn the shade over if you like), basted in place, and sewn. This will create a 1-1/2 inch sleeve into which the weight rod can be inserted.
The hems and the sleeve should all be folded over onto the back side of the shade. The front side of the shade should be a smooth spread of fabric at this point
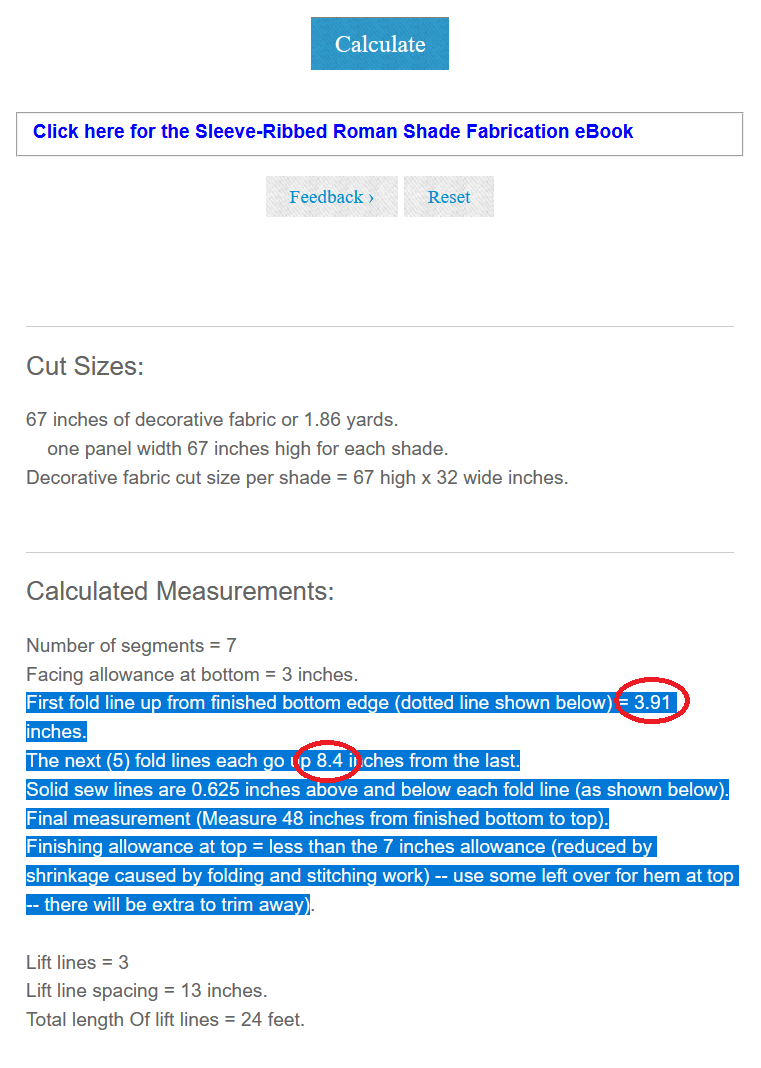
Calculated Measurements for a 32 by 61 Inch Shade
With the shade back side up, square it up on your work surface and secure it in position. Eric uses awls and clamps in the video. Your work surface may be less tolerant -- if so simple bean bag weights work well. The "Calculated Measurements" section of the Fabric Calculator provides a roadmap for the location of our shade ribs. The image detail here is for the 32 inch by 61 inch shade that we started with above.
The fold lines for the rib sleeves are measured up from the bottom of the shade (which is now finished). Place lines on the back side of the shade as directed by highlighted lines and circled dimensions in the Calculated Measurements illustration. The first, lowest, line (here 3.91 inches) will be of reduced height. The rest (here 5 lines) will be larger (here 8.4 inches) and placed equally up from this first one.
Use a marker that gives a temporary line at each location. Each line should run from side to side and perpendicular to those sides.
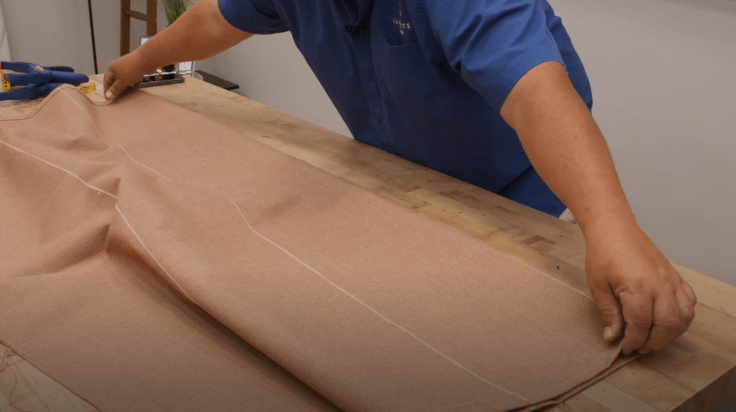
Fold Each Rib Line Under to the Back Side of the Shade
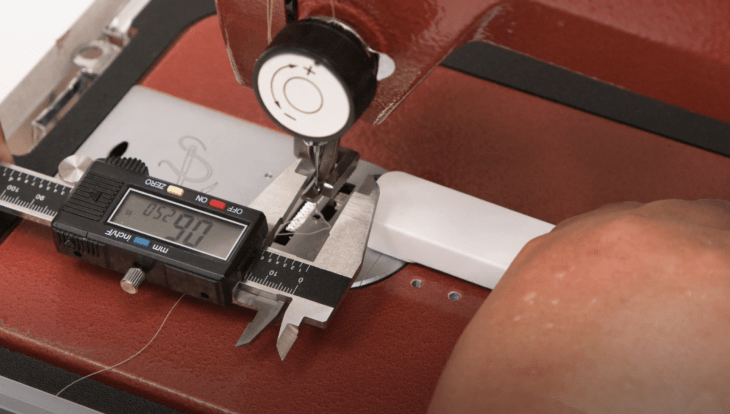
Using a Caliper to Set Up the Magnetic Guide
Then fold the shade back onto itself at each rib line. Note that the fold is such that front side is against front side -- the hems will be exposed. These folds must be accurate. Crease them well. We like to fold and crease them all before taking them to the sewing machine.
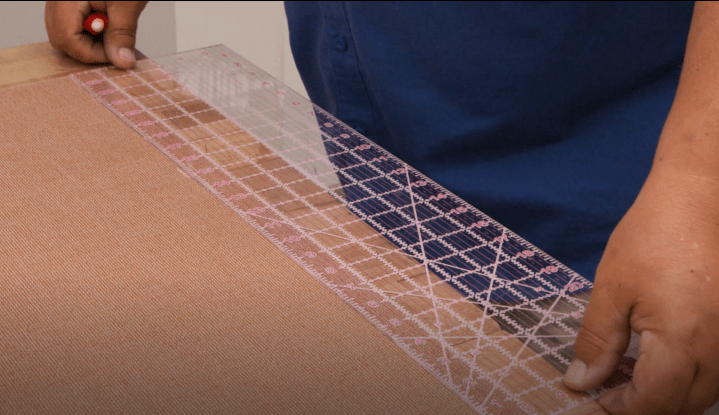
A line of straight stitches will be run across the width of the shade just above each fold line as indicated by the "solid sew lines" in the rendition (the distance from the folded edge is .625 inch in our example "Calculated Measurement" illustration above). "Wonder Clips" can be used as Eric demonstrates in the video to keep everything in place. Accuracy here is very important. We want the ribs to fit snugly but it is also necessary that they fit at all! The Magnetic Sewing Guide can be used to help to provide this accuracy as shown here.
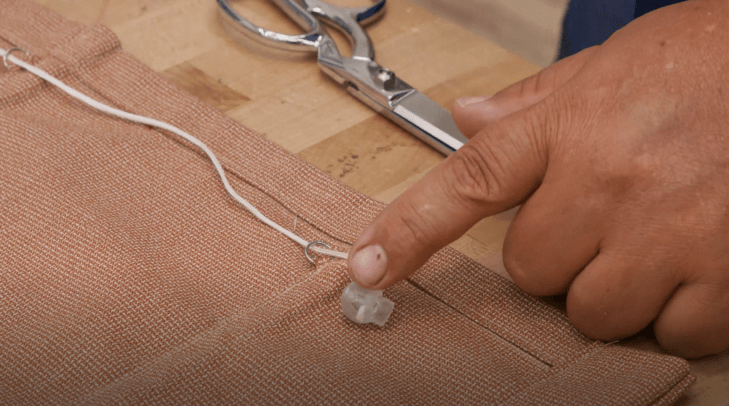
We like to cut a 1 inch wide length of scrap cloth to secure the rings. Fold and baste this "tape" in half making it 1/2 inch wide. Cut 1.25 inch lengths from this strip and push each one through a small brass ring.
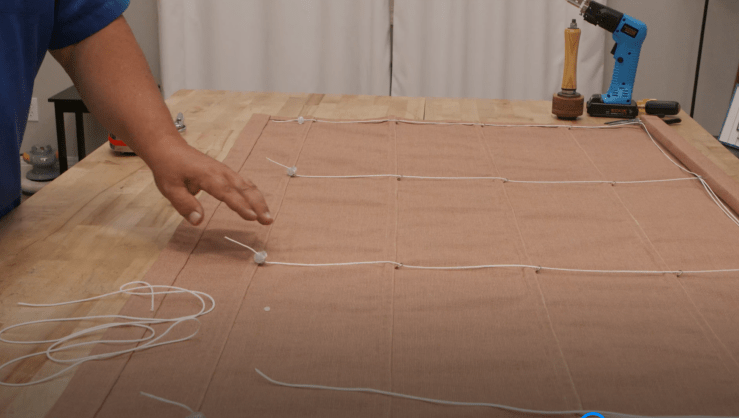
These rings are spaced 1.5 inches from the sides of the shade and at equal intervals across the width of the shade. The Fabric Calculator will indicate the number of lift lines and their spacing and the total length of line required on the last three lines in the "Calculated Measurements" section. Mark the location of each ring on the back of the shade.
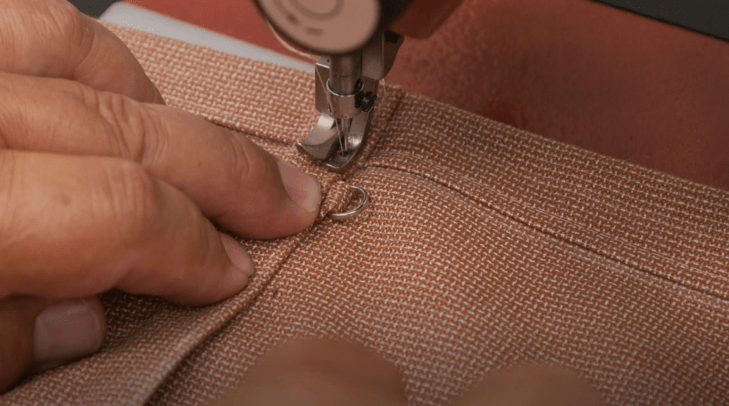
Sewing Right Below the Ring
On the back side of the shade the sleeves will be sewn with a second stitch. Fold the sleeves up toward the top of the shade and place a row of straight stitches all along and very close to the fold edge. At appropriate intervals secure small brass rings which will be used as guides for the lift lines. Simply push the 1/2 inch tapes that were created above under the folded sleeve and continue to stitch just below the bottom of the rings. To keep the stitch close to the ring and right along the folded sleeve edge it will be necessary to use a zipper foot on the machine. if such a foot is not available, sew right up to the ring tape -- skip over it -- and continue sewing. Then return to each ring and hand sew under the rings to complete the length of stitches.
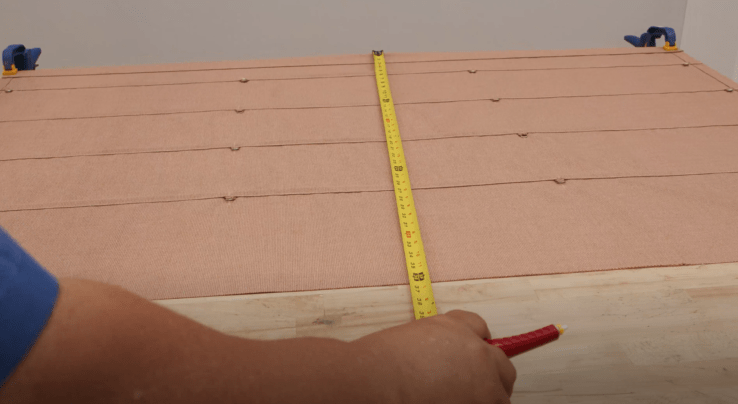
Measuring the Finished Height
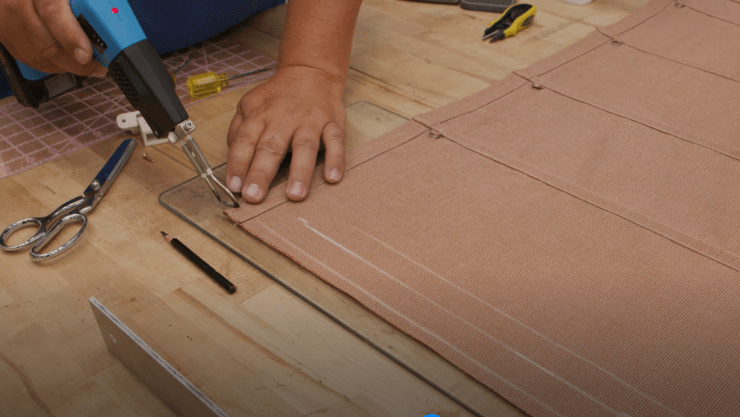
Cutting Excess Fabric at the Top of the Shade
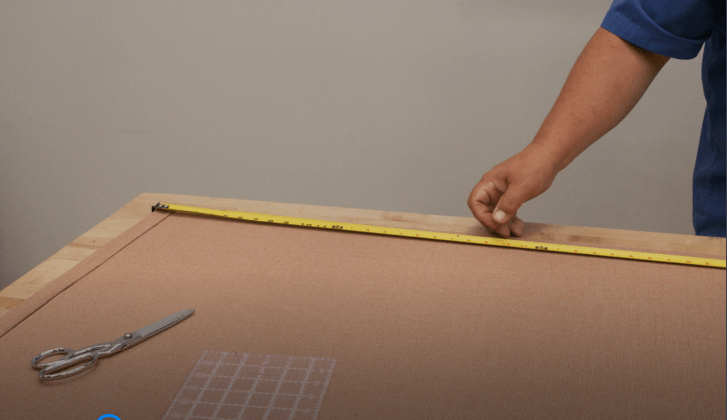
With the shade back side up measure from the finished bottom edge toward the top of the shade the desired finished height of the shade and put down a chalk line. Then, 1 inch on either side of this line put down two more lines. Cut the top of the shade on the upper most line and fold that edge over to create a 1 inch wide hem at the top of the shade. Eric uses a hotknife for this cut since it is a single fold, but a scissors could be used as well -- the Velcro tape will cover the raw edge.
Baste the Velro "loop" tape in place over this hem but slightly below the shade top. Keep the Velcro on top as it goes through the sewing machine -- it will feed more accurately. Secure it with straight stitches along both sides of the tape and accross the ends as well.
Attaching Velcro Hook to the Wrapped Headboard
Prepare a headboard (usually 1 x 2 lumber) as long as the width of the finished shade. The headboard can be wrapped like a present with scrap cloth stapled in place if desired. Or it can be painted. Put screw eyes in the bottom (one narrow edge) of the headboard that match the placement of the rings on the ribs. Accuracy here is important – otherwise the shade will be pulled to one side or the other when fully retracted. Then staple Velcro hook tape on the front of the headboard.
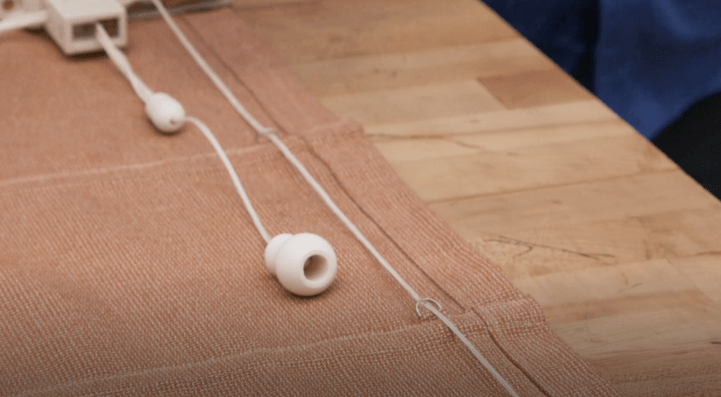
Plastic Orbs at the Ends of the Lift Lines
Running Lift Lines
Cord Lock Detail
A Lift Line Condenser
A Lift Line Tassle
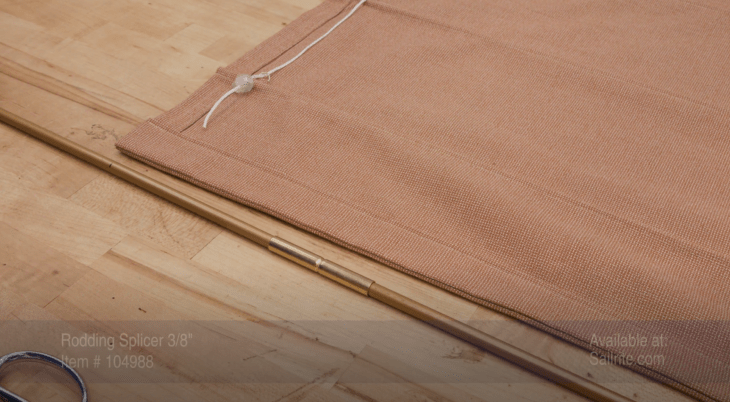
A Weight Rod Splicing Tube May Be Required
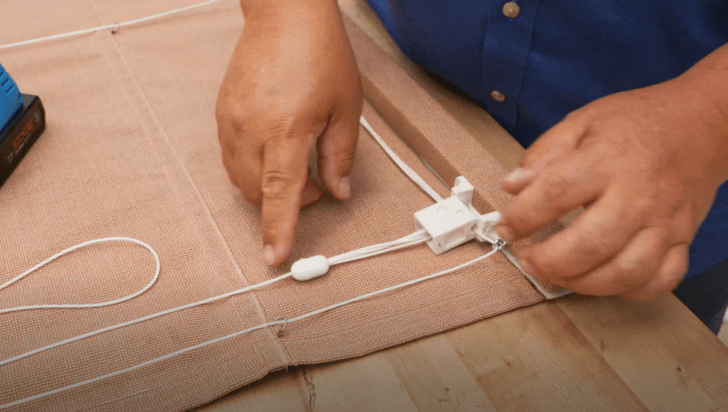
Run any small braided line (we like to use "leech line" intended to adjust the trailing edge of a sail) through all of the rings at each rib and up through the eyes in the headboard. Each line should be roughly the length of the full shade plus shade width from the appropriate screw eye to the cord lock plus a foot or so. We like to use spring loaded "orb adjusters" to secure these lines below the bottom rings (these are easily adjusted), but it is OK to tie them in place as well. Then thread each cord up through the rings above.
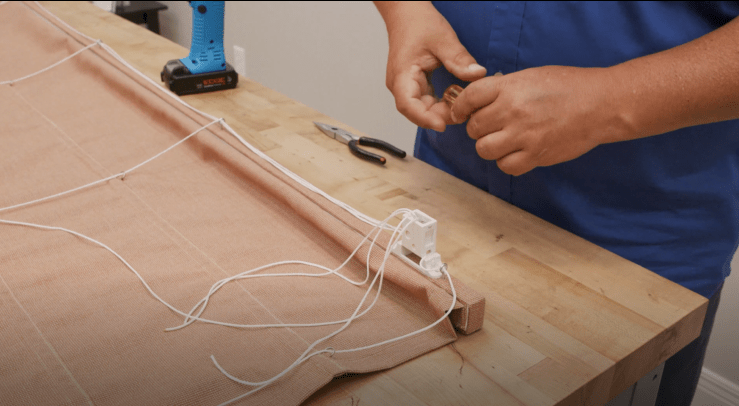
The cord lock should be installed just inside the screw on the left or the one on the right. The large opening in the device should be on the side with multiple lines. Thread the lines neatly into the cord lock. Then use screws to secure the cord lock in place on the narrow edge of the headboard.
A lift line condenser can be used to reduce the tangle of lines that emerge from the bottom of the cord lock. A "tassle" can be used to dress up the single line that is used to raise and lower the shade.
Insert the ribs and the weight rod at the bottom of the shade.
Peal the top of the shade away from the headboard so that screws can be driven into the board securing it either to the face of a wall or up against the frame of an opening. Smooth the top back in place. Minor adjustments can be made by pealing the Velcro tape back and reapplying it.
© 2016 - Sailrite Enterprises