What are Wire Hung Canopies?
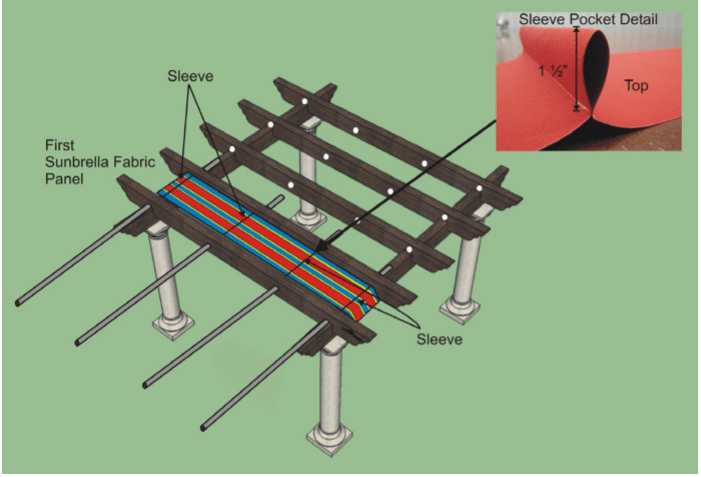
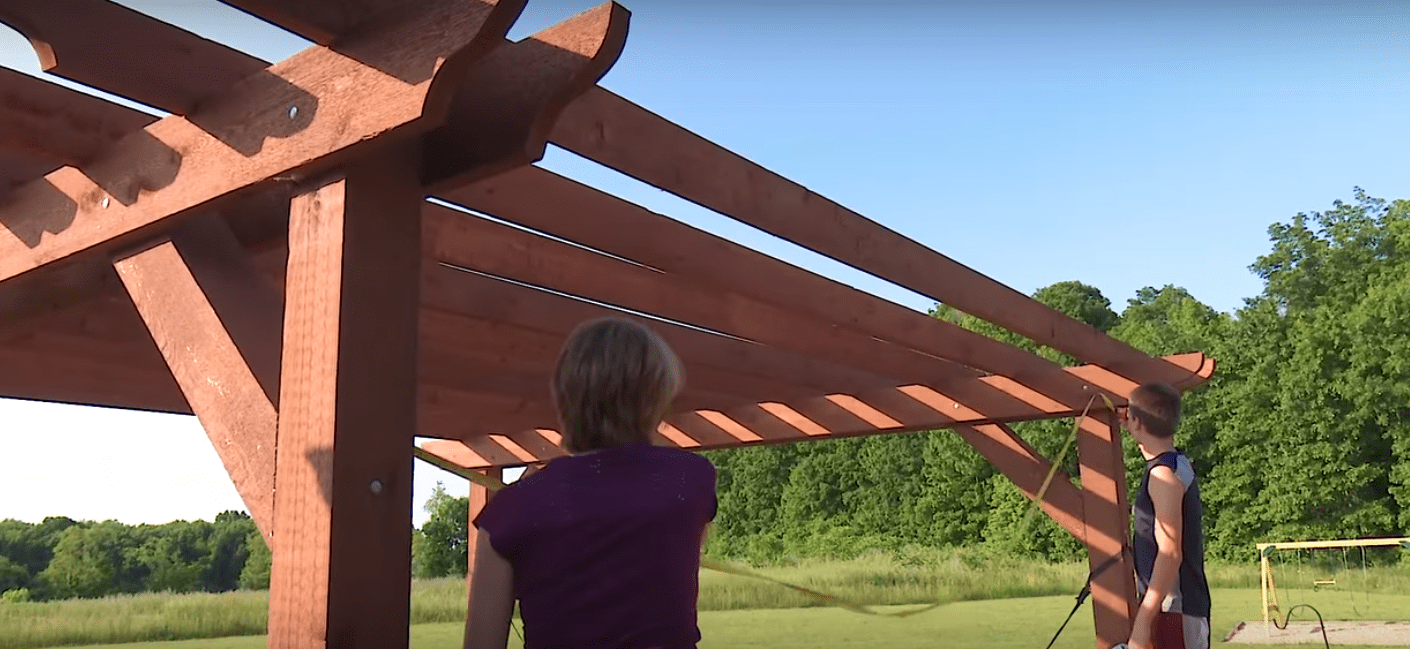
A Pergola with a Fixed Canopy
Canopies: Canopies are lengths of fabric extended from overhead structures that provide shelter from the elements. The can be mounted in a fixed position. Such canopies are often used with pergola structures like the one illustrated here.
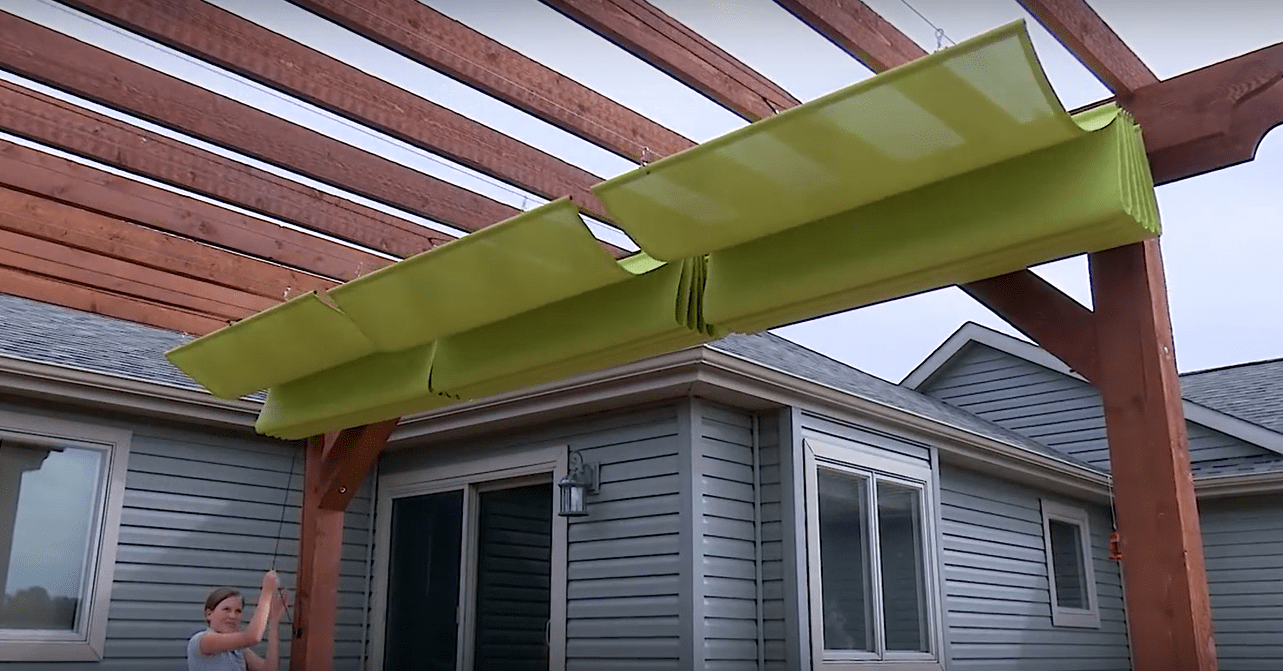
Wire Hung: Wire hung canopies, in contrast to fixed ones, are suspended below the structure on taught wires with metal clips. These canopies can be extended or retracted on their supporting wires. When a canopy is retracted the folds will deepen. Indeed, at full retraction, they will hang down a distance equal to half the span length. For this reason, the wire runners should be mounted at least 97 inches or so high.
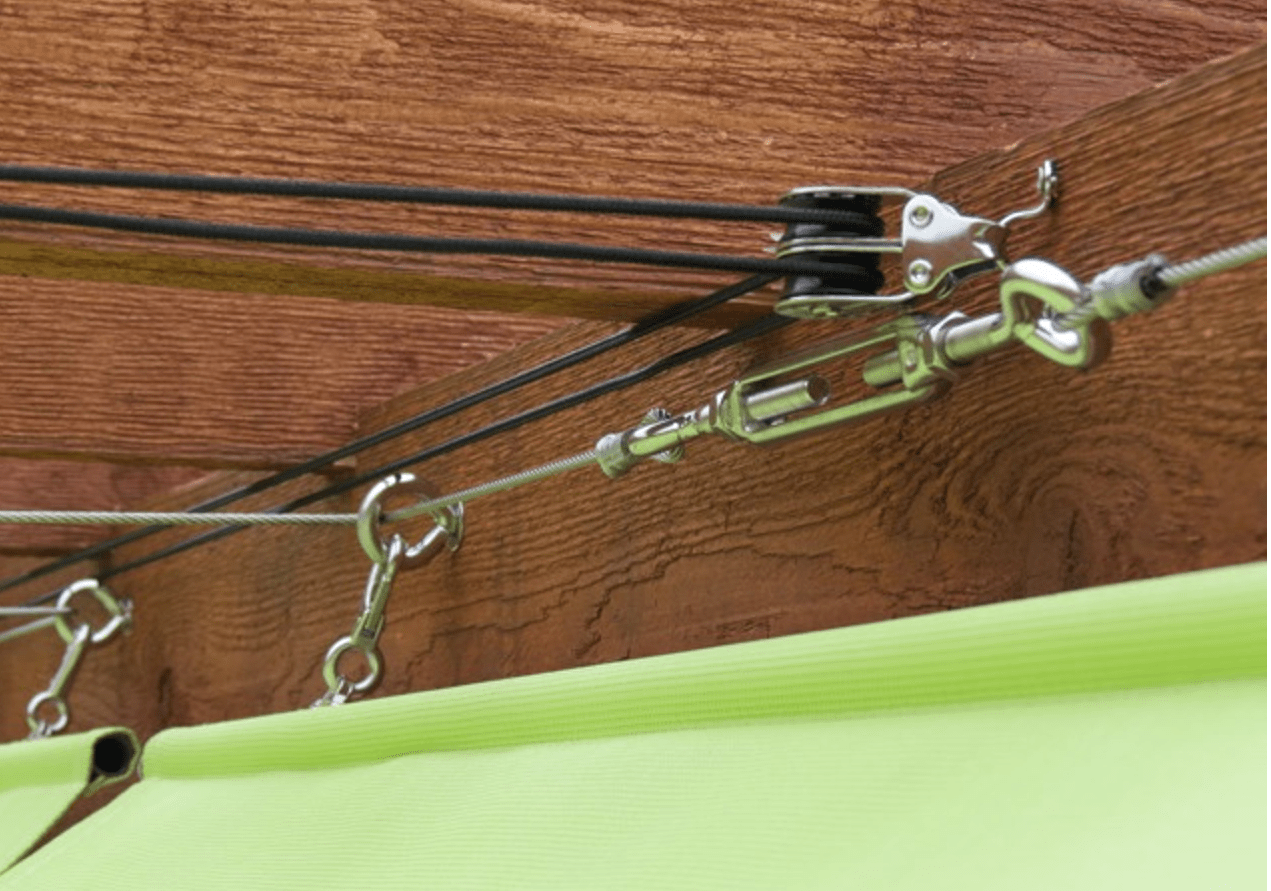
Pulley System: To make the adjustment of wire hung canopies possible,
a pulley system is often rigged. There are, of course, many ways to do this but
we will assume a system similar to that illustrated below.
Using one line it is possible to open or close or adjust several canopies. This
is the canopy system for which instructions will be provided in what follows.
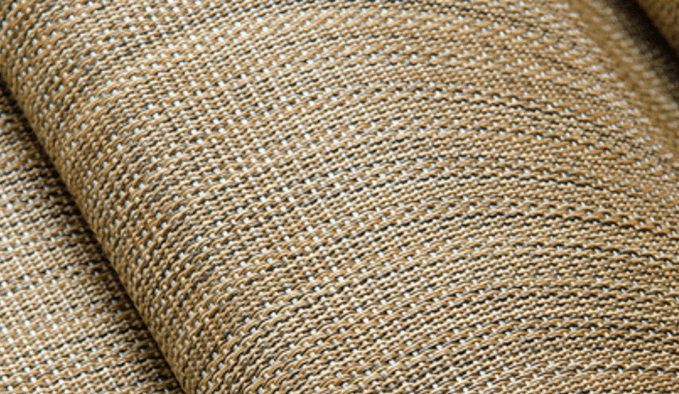
Phifertex Plus on the Left and Sunbrella Marine on the Right
Fabric: Sunbrella Marine Grade fabric or Phifertex Plus mesh fabric
is commonly used for wire hung canopies. Sunbrella is excellent at providing long
lasting shade in the most extreme heat and sun and it is highly water resistant.
Phifertex Plus cuts light by 90 to 95% and funnels off most rain which can make for
a very comfortable shelter -- it, too, is remarkably durable. Other upholstery fabrics
are certainly acceptable, but their resistance to Ultraviolet light will be more
limited leading to more rapid deterioration. For indoor applications you may want
to consider Sunbrella, Covington, Geobella, P/K Lifestyles, P/Kaufman, Ultrafabrics,
or Waverly upholstery fabric.
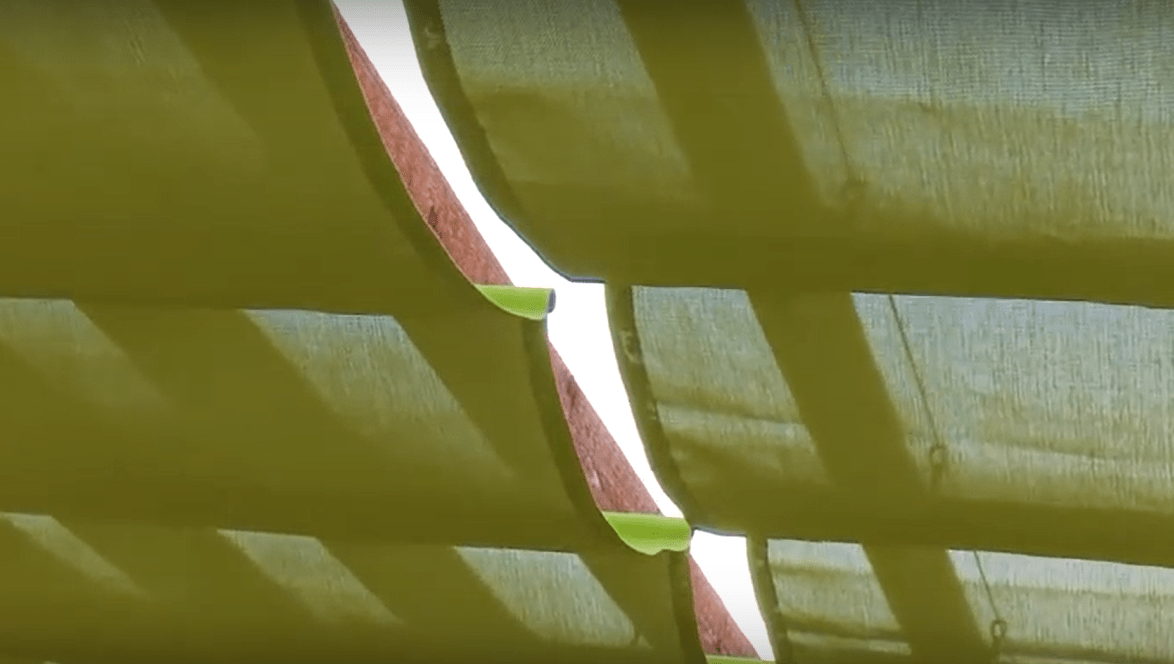
Fabric Width: The width of the fabric chosen is important since canopies are constructed of multiple panels with small gaps (usually 3 inches) between each pair. There are several advantages to this system. First, it is possible to adjust each panel separately from the others regulating coverage (although the single line closure system that we prefer obviates this advantage). Second, the panels open and close more easily and accurately when they are of limited width. Third, rain water will not collect in a narrow width. Fourth, and perhaps most important, the segmented canopy looks great!
Using the calculator it will be noticed that changing the fabric width will greatly effect the number of panels. When possible pick a fabric with a width that reduces the the extent of scrap material. At the same time, keep the number of panels to a minimum since each additional one requires more labor and hardware. Use the calculator to experiment with different fabric widths.
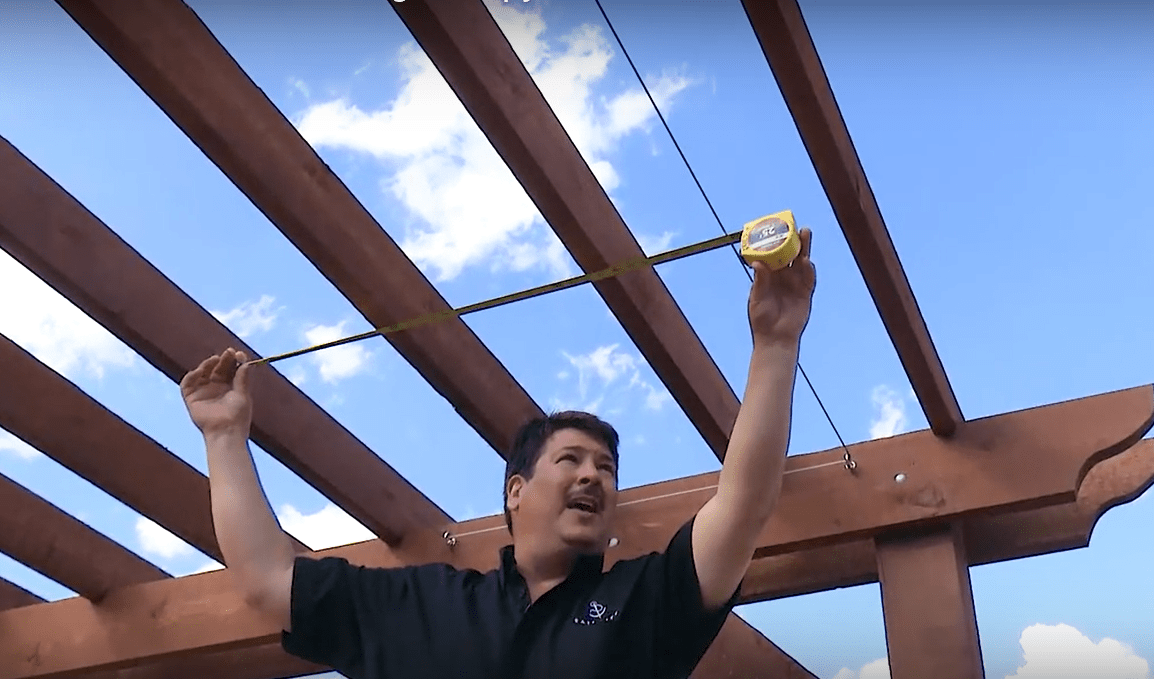
Measuring Length
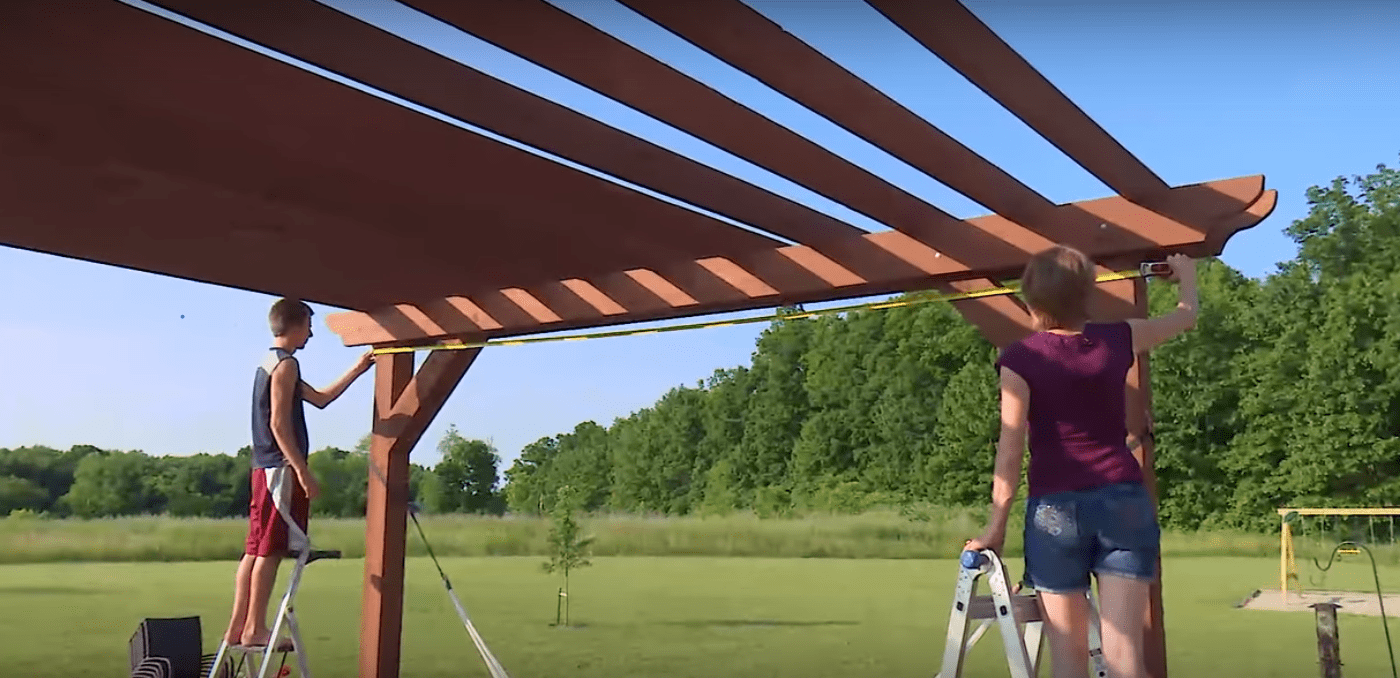
Measuring Width
Fill Length: The length of the opening to be filled. This usually means a measurement from one eye bolt to another at opposite ends of the structure.
Fill Width:The number of canopies required depends fabric width, the width of your area covered and the desired appearance of the wire hung canopies. Most wire hung canopy panels are usually not more than 60 inches (1524 mm) wide. To fill a space, multiple canopies are typically used. Each canopy should be spaced about 3 inches apart or so for best operation and that spacing is assumed by the calculator.
A 15% Swag
Swag: Our calculations will assume a 15% swag for each span. This means that, when the canopy is fully extended, each fabric span between supporting pipes will be 1.058 times longer than the distance between pipes measured in a straight line. The swag results in a natural fabric drape when the canopy is fully extended that is very attractive.
Using the Calculator
Open the calculator by hitting the third "Calculator" tab at the head of this app. There is a selector at the top to indicate wheather measurements are to be in inches or millimeters. That is followed by three required input fields: Structure Width, Length, and Fabric Width.
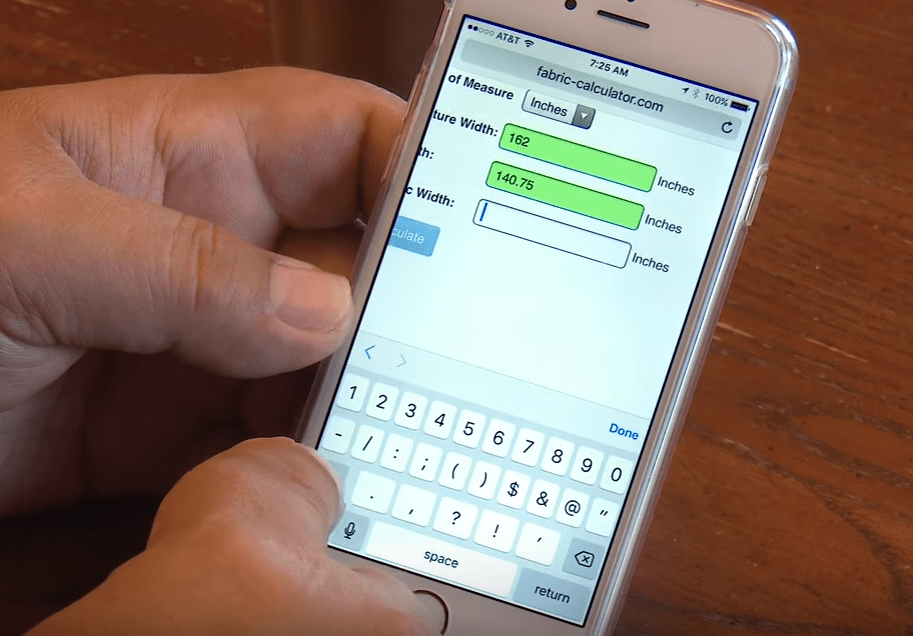
The Calculator App on an IPhone
When the measurements are entered and the "Calculate" button is hit the app generates, first, a list of dimensions to guide canopy construction, then a list of materials for the canopies, then a list of materials if a pulley system is desired, and, finally, a list of tools that will come in handy. All this is followed by a scale rendition of one panel. The rendition will show the full fabric width with the panel, at its finished scale (hems will be fashioned of excess fabric on each edge), centered on it. All of the folds required to create spans and sleeves will be shown in their relative positions on the image.
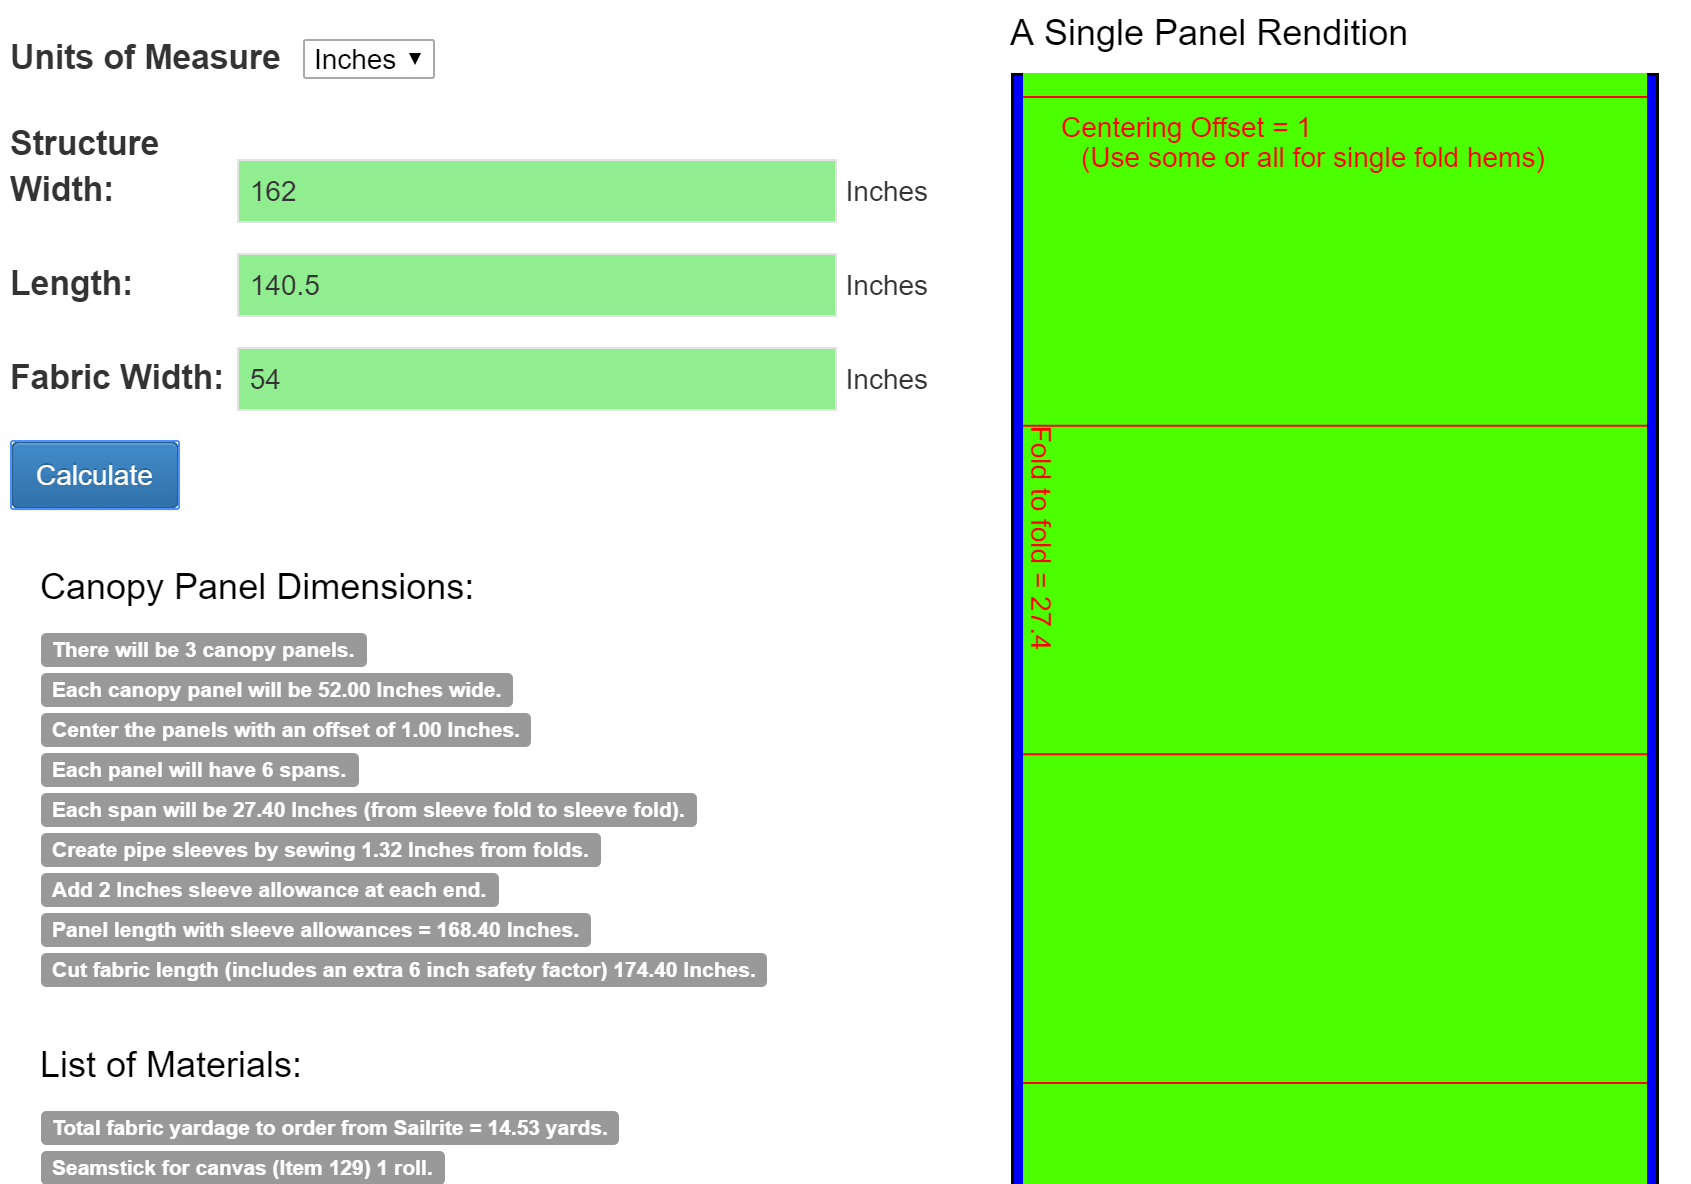
The Rendered Panel
Each panel is shown centered on the calculator rendition in case there is a pattern on the fabric. This keeps the patterns uniform in their placement across all panels. It also provides for extra material along each side for hems if necessary (more about hems below). There will be horizontal lines on the panel rendition to indicate sleeve folds. At these lines, the fabric will be sharply creased and secured with pins or staples. A row of straight stitches 1-5/16 inches inside the folds will create sleeves for conduit tubing rods.
Cut and Hem the Panels
The calculator displays a "Cut fabric length" at the bottom of the Canopy Panel Dimension listing. This figure includes the total of all spans plus short lengths at each end to form sleeves plus an extra "fudge factor". The fudge factor is necessary because we start construction at one end and move down the panel sewing sleeves at each end and at the end of each span. This activity can introduce minor inconsistencies not apparent in the depth of swags until the last one (all the error compounded could radically shorten that span). The extra length insures that each span can be made consistent from beginning to end.
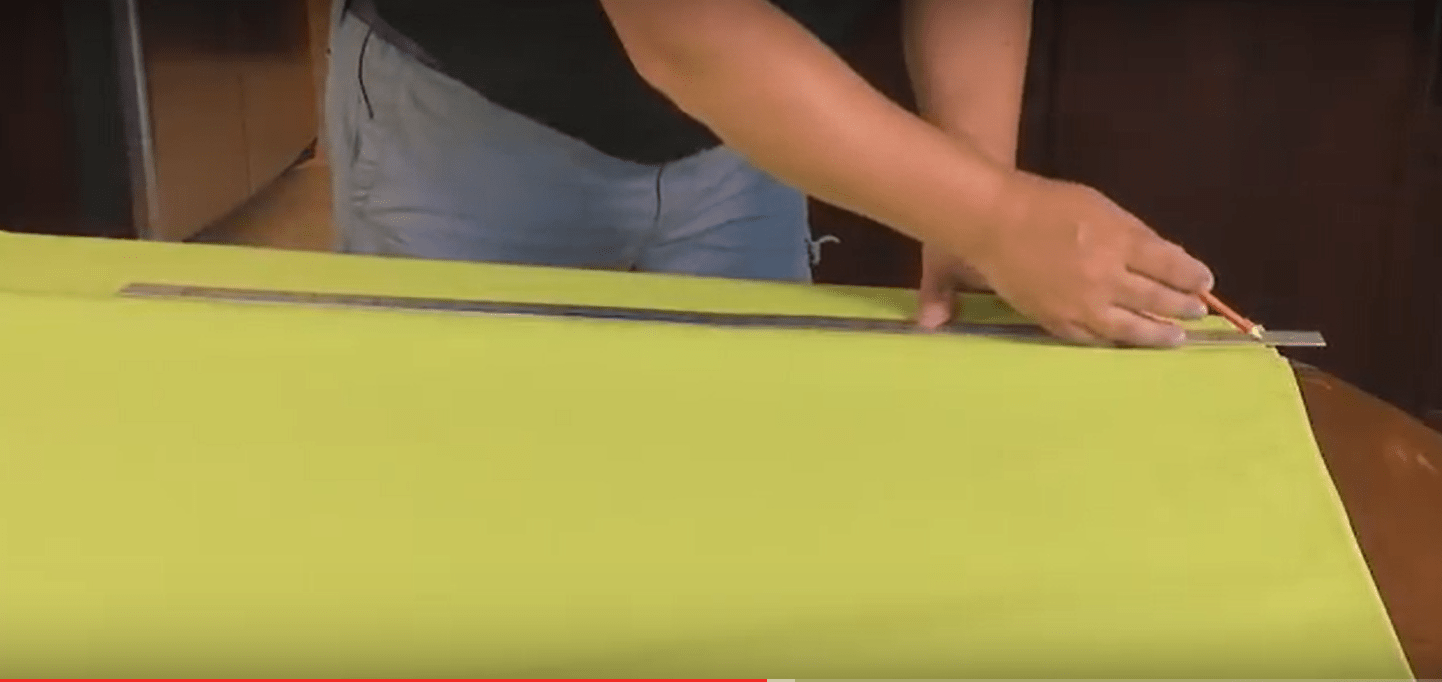
Cut Scrap Fabric from Edges
Having cut the panels into equal lengths, cut away scrap cloth along both sides of the centered panel. Use the "centering offset" measuring from both sides of the fabric. All panels usually have a one inch (25.4 mm) fold of cloth (a hem) along their two long edges unless they are cut with a hotknife. Be sure to subtract that inch from the centering offset before cutting fabrics that will be hemmed. It is enough to simply cut the fabric with shears and fold it once to form the hem -- any raveling will be minimal. If a hotknife is used to cut the fabric (assuming that it is a synthetic blend), raveling will not be a problem and the hem can be eliminated. In any case, avoid more than a single fold of cloth as a hem in order to reduce the likelyhood of thickness along the edges that can trap rain water (we will mount the canopy panels so the hems are up for appearance sake).
Hems can be secured in place prior to sewing with staples or with a basting tape (or both). They can be sewn with a single stitch, either straight or zig-zag.
Sewing Instructions
End Sleeve Construction: Start at one of the short ends and create a 1/2 inch single hem. I like to baste, pin or staple and then sew with a 5 to 6mm straight stitch to secure the hem. Then measure over 2.75 inches from the finished folded hemmed edge and mark the fabric. Fold the fabric’s edge (where the folded ½” hem edge was created) over to the mark you made on the fabric at 2.75” and pin or staple (do not baste) the fabric at that location. Now create your first sleeve by sewing about 1/8” from the fold of the ½” hem at that location. Be sure to reverse at the beginning and end of your sewing to lock the stitch in place and sew with a 5mm to 6mm straight stitch across the width of the fabric. This should result in a sleeve, when lying flat, from fold to stitch of about 1 5/16”. Test the sleeve to see if a ½” EMT conduit will fit inside the pocket, it will be especially snug where the hems are, so this will require a little effort to get it to pushed inside (remove the pipe when you are confident it works well).
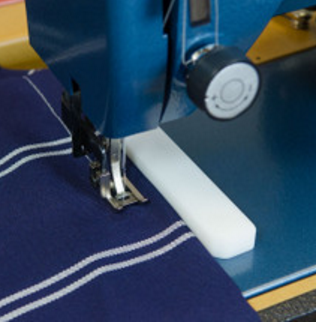
A Magnetic Sewing Guide is Helpful
Sleeve Construction at Spans:Next flip the fabric over (so hems are down). From the first sleeve’s folded edge measure over the “Span length” and mark the fabric (on sides and at center location). Fold the fabric at that location (folded under to the hemmed side). Be sure the fold is 90 degrees from the long edge of the fabric. (Hint: If the fabric’s long edges (hemmed edges) are even, the fold will be straight). Pin or staple the fabric about ¾” from that folded edge all along the width (securing your fold and creating a pocket or sleeve). Then sew a straight stitch that is 1 5/16” away from the folded edge. Be sure to reverse at the beginning and end of your sewing to lock the stitch in place and sew with a 5mm to 6mm straight stitch across the width of the fabric. This creates your next sleeve.
Repeat this process for succeeding sleeves until you reach the last sleeve. On the final sleeve measure over the “Span length” and mark the fabric, then measure from that mark over 1.93” (1 15/16”) and mark the fabric again. At this last mark location cut off any excess fabric. From the end of the fabric create a ½” hem, just like you did on the first short edge. Then about an 1/8” from the folded hemmed edge place another stitch creating your last sleeve/pocket which should be about 1 5/16” when laying flat.
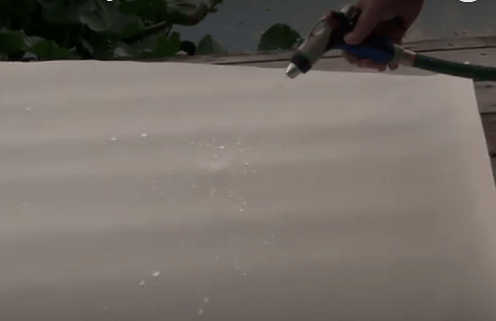
Important Note for Sunbrella Canopies: If using Sunbrella Marine Grade fabric, it is a very water resistant fabric that will hold water when it rains. To reduce pooling water install a grommet in the center of each span for water drainage. The size of the grommet is not critical and, although we use spur grommets ourselves, the type of grommet used is also not important since there is no strain on it. If using Phifertex or Phifertex Plus mesh fabric the grommet is not needed.
The Wire Runs
Install Eye Bolts or Pad Eyes (#120270 or #120273): Each eye should be 3 to 7 inches (76 to 178 mm) inside the edges of the canopy panels and from 97 to 110 inches (2463 to 2794 mm) high. There will be four eyes for each canopy panel -- two at each end. Wire rope will be threaded through each set of four eyes creating a rectangle. Each rectangle of wire can be tensioned with a single stainless steel turnbuckle as shown below.
A Turnbuckle Tensions the Rectangle of Wire
Cut the wire rope: Add 6 inches or so to a length of wire totaling twice the measurement from eye to eye plus twice the distance between each pair of eyes at the ends of each panel less the length of a stainless steel turnbuckle. The extra will be used to create eyes. The wire can be cut with a heavy duty wire cutter or with a cut off wheel in a Dremel tool. Nicropress sleeves will make for the neatest loops, but wire rope clamps are perfectly acceptable.
Tubing Preparation
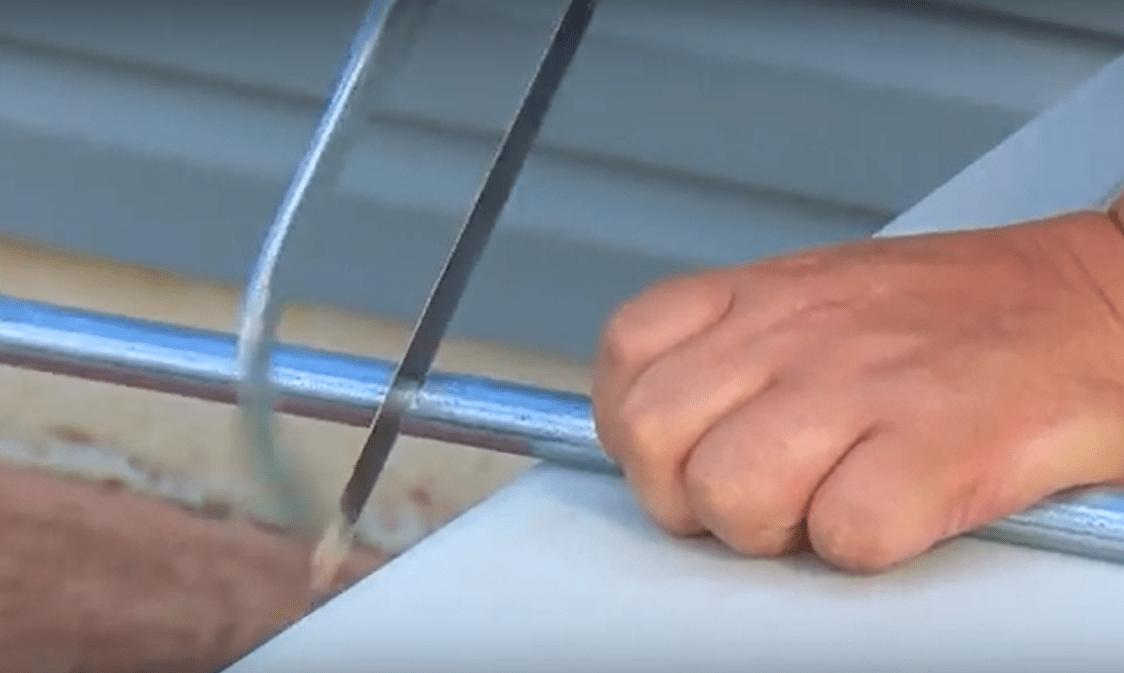
Cutting with a Hack Saw
Cut the Tubing: 1/2" EMT tubing (often called "conduit") and the #8 x 1/2 inch self tapping screws with hex heads used to secure stap eyes to the tubing can be purchased at a hardware store. Cut the ½” EMT tubing to the width of the panels minus about a half inch or so. The ends of the tubing should be long enough to rest inside the hemmed edges of the sleeves -- they should not protrude from the sleeves.
Measuring for Strap Eye Placement
Install Strap Eyes: Measure the distance between each pair of wire ropes running the length of the canopy structure. Center and mark this measurment on the lengths of tuping appropriate for each panel run ( measurement may vary a bit from panel wire set to panel wire set). A Strap Eye and Fixed Eye Snap Hook will be installed on the pipe at these locations. Place a strap eye centered over the marks just placed on the pipe.
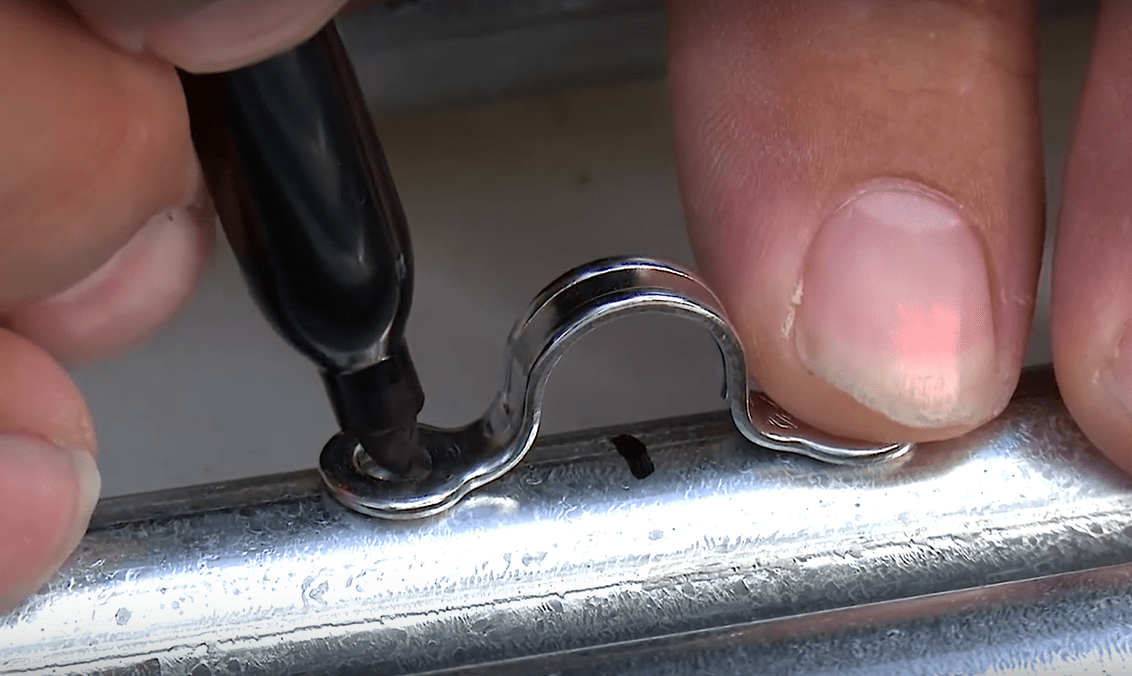
The Strap Eye Marks
Mark the two holes where screws will be used to secure the strap eye to the pipe. Then pre-drill for a #8 self-tapping screw. Drill just one side of the tubing. Do this for each section of tubing. (HINT: ½” EMT tubing has a very visible weld line that should be perfectly stright along the pipe, use that line as a guide for drilling the holes to be assured they are in a stright line along the pipe.)
Prepare Sleeves: Line up a cut tubing length with pre-drilled holes over each sleeve (not inside the sleeves but over them). Mark the folded sleeves at each pre-drilled hole (there should be 4 marks on each sleeve’s fold).
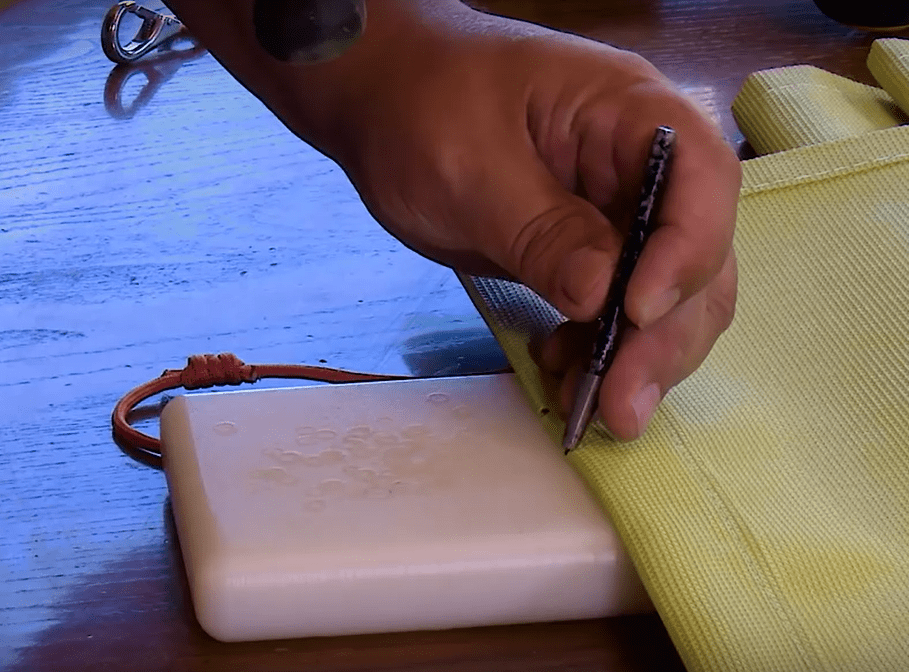
Cutting Holes in a Sleeve
Use a 1/8” hole cutter from Sailrite #102235 and place it half way over the marks on your fabric along the fold of each sleeve and punch a hole in the fabric (this hole is a half moon apparance, but when the sleeve is unfolded it is a round hole). Use a cutting block #103651 or #378100 on the underside to keep from dulling the tool and to prevent damaging the canopy fabric elsewhere when puching the hole.
Eye Strap with Snap
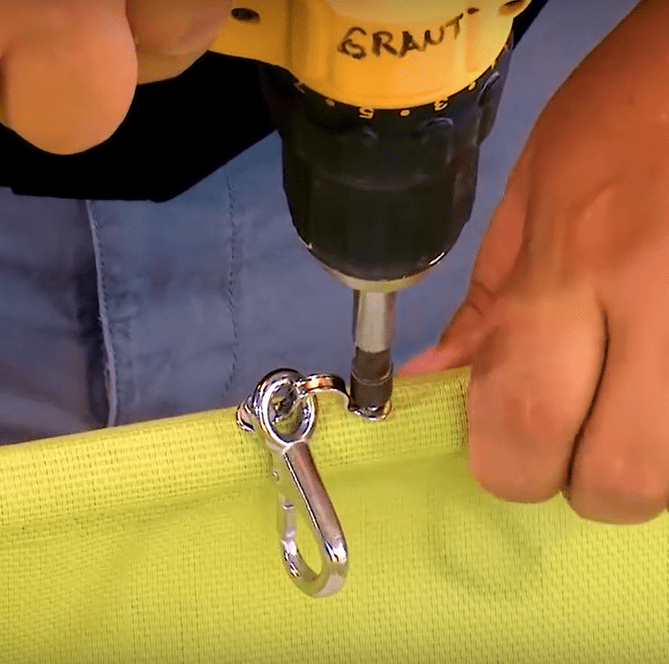
Tubing Insertion: Next insert the tubing into the sleeve carefully (it should fit very snuggly inside the sleeve). Once the pipe is inside the sleeve, you may need to rotate the pipe until the holes in the fabric line up the holes in the pipe. (HINT: Use a pair of needle nose pliers to rotate the pipe inside the sleeve. Line up one side at a time then move to the other and repeat the process.) Position a Strap Eye with a Fixed Eye Snap in place on the strap eye. Then use the #8 self-drilling screws and secure the strap eye. Repeat these steps for the opposite end of the sleeve. Ensure that the hardware on both ends of the sleeve is centered at the top edge of the sleeve. Repeat this process for each tubing/sleeve assembly.
The Pulley and Rope System
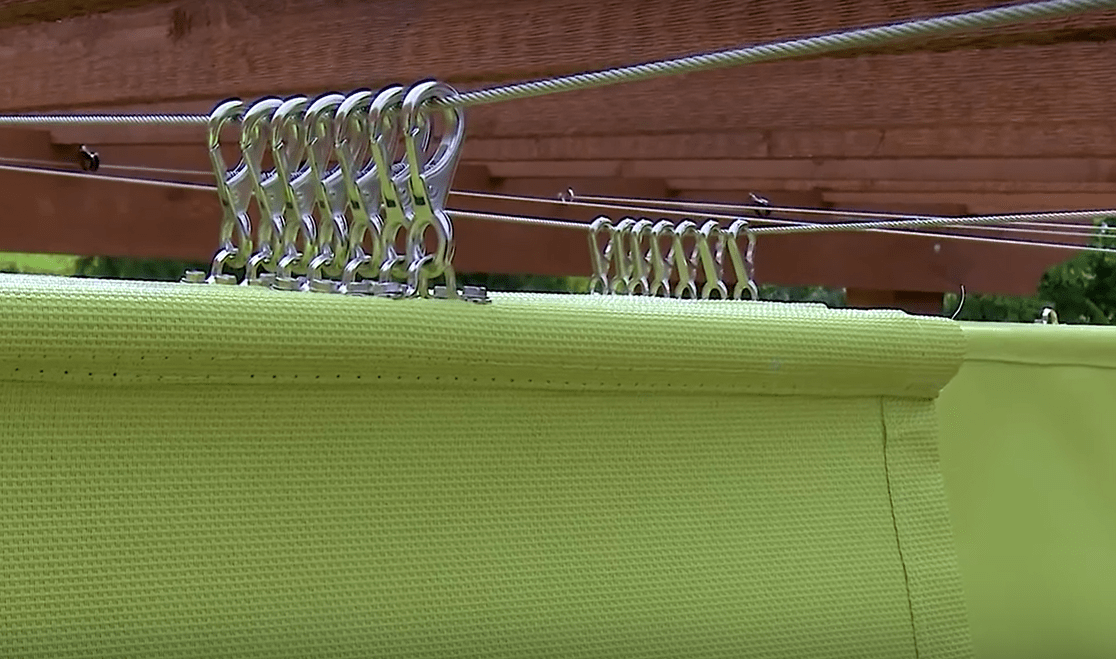
Canopies Snaped in Place
It is perfectly OK to open and close each canopy panel one at a time using a prod to push the spans back and forth. But it is wonderfully convenient to be able to pull one line to open or close all panels at the same time.
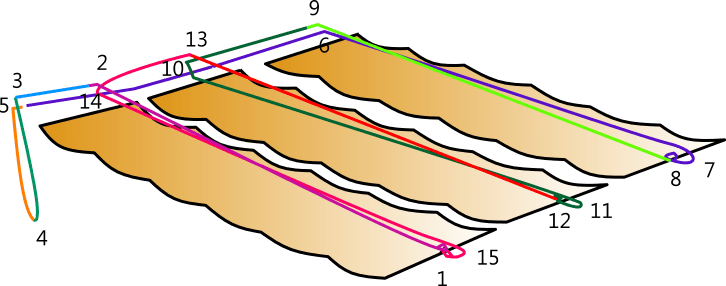
Single Line System
The supplies required for this single line system are listed in a separate section as part of the output generated by the Calculator. There will be double blocks and single blocks and cheek blocks and strap eyes and a clam cleat and line, of course, as well as screws to put it all together.
Any number of panels can be linked together using the system illustrated below. The key is to start with the panel on the "control" side (1 below) following the diagram steps one at a time to the panel opposite (6) and the work back one panel at a time with a continuous length of line. Double blocks are used at the "open" side of each canopy panel (2 and 14, 13 and 10, 9 and 6) and single blocks are used at the "closed" side of each (7, 11, and 15). A cheek block (4) and a double block (5) are used to drop the line down to a convenient position on the control side. The clam cleat is used just above the cheek block to lock the canopy open or closed.
Of course there may be more or fewer panels, but the rigging process described here will apply. It is, however, best to keep each pulley system confined to 3 or fewer panels. Otherwise the effort required to retract and extend becomes extreme. If there are between 2 and 6 panels, make 2 separate systems. Between 6 and 9 panels create 3 systems. The list of materials generated by the calculator will include extra cheek blocks, double blocks, and cam cleats to provide for this.
The Optional Webbing Strap System
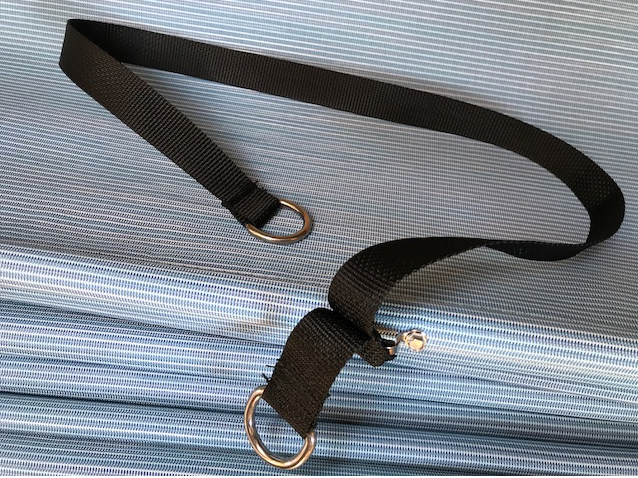
Webbing Strap to Open and Close Canopy
If you have opted not to use the Optional Pulley Rope Open/Close System, you may want to attach a webbing strap to the end of each canopy. This length of webbing can be used to pull the canopy open and closed and secure it in those positions. This 1” webbing strap (Item # 103416) will include stainless steel D-rings (Item # 485) on each end, these will be used to secure it to the structure via stainless steel hooks (Item # 100648). Since the canopy will be difficult to reach a stick can be fashioned with a hook end or a “Boat Hook Pole” can be used to position the D-ring onto the hooks.
To make the webbing strap – Fold up one of your finished canopies, as it would be folded when retracted, on a table top. Measure the circumference around the canopy stack. Add 7 inches to that circumference measurement and cut one webbing strap per each canopy. Use a hot knife or lighter to carefully melt the ends of the webbing to keep them from unraveling. On the two ends of the webbing secure a D-ring. Run webbing end through a D-ring and secure with a 1 inch overlap sewing the D-ring in place in this 1” overlapped loop. On one end of the webbing, about 3 inches from end of the D-ring, fold the webbing at this location and sew this loop eye in place forming a 1 inch loop eye/opening. This loop eye/opening will be used to secure the webbing strap to a “Stainless Steel Strap Eye” (Item # 120461) which should be screwed the center position on one end of the canopy (see photo).
Securing the Hooks - Attach the canopy to the wire ropes on your structure and then determine the best location to screw the Fender (Lacing) Hooks to your structure. To accomplish this on the retracted side push the canopy back, folded back, wrap the longer end of the webbing strap around and under the folded canopy. Screw the hook in place on the structure at a location where the webbing strap will securely hold the canopy in its folded back position. Then on the opposite end of the structure pull the canopy to its extended position, pulled over the area it covers. This side will use the short end of webbing with D-ring, it should be secured to the structure via another Fender (Lacing) Hook. Determine the best position to keep the canopy extended and screw the hook to the structure. NOTE: It may be necessary to bend the end of the fender hooks inwards to help keep D-ring in place in strong winds.